

A little disclaimer before we begin: There are many ways to stretch and prepare a surface for painting. This is one of the trusted and tried methods here at Gwartzman’s!
Let’s start at the beginning. What is canvas, exactly? And why is stretching a piece of fabric over a frame the preferred method of so many painters?
Canvas is plain woven cotton or linen, as opposed to twill woven cotton, such as denim. (Take a look at your jeans next time you’re wearing them - twill has a diagonal weave, and canvas does not). Canvas has many uses aside from painting, such as backpacks, shoes and aprons, all items that benefit from it’s sturdy weave. You might see some canvas referred to as “cotton duck” and that indicates that it has a tighter weave than regular canvas. The word “duck” comes from the Dutch word for cloth, doek.
Cotton canvas, as we know, is made from the cotton plant and is the most common type of material used in modern canvases. Historically, linen and hemp were used, and you can still find linen in use today. Linen is a fabric made from the flax plant. It’s more expensive because it’s a less common fabric than cotton, and it’s much harder to process flax into linen than cotton plants into woven cotton.

Close up of canvas weave
Canvas has been in use as a surface for painting since the 15th century, although it did not become the most common surface until the 16-17th centuries in Europe. Wooden panels were used primarily for paintings before then. Canvas was considered an improvement over wood since it could be taken off the stretcher and rolled for easier transportation. Wood panels were also more prone to warping and splitting.
Both cotton and linen canvas can have various weaves, from extra-fine to heavy. This refers to the texture of the canvas. If you want the surface of your painting to be as smooth as possible, go for the finer weave, and if you consider the texture of the canvas to be a feature, a medium or heavy textured canvas might be right for you. Most pre-primed, pre-stretched canvases are made with medium weave canvas.
Linen canvas was used by the old masters as it could be made into an extra-fine weave that created a smoother surface for the highly rendered, highly realistic painting that was prized during the renaissance.
Canvas at Gwartzman’s is sold by the foot or by the roll, and is available in widths from 36” to 144” to best suit the size of your painting. It comes in both cotton and linen, primed and unprimed.
Why do we prime canvas? Before acrylic painting was the norm, oil paints were the medium of choice for most artists. Priming the canvas with a rabbit skin glue size, then covering it with an oil ground made of resin, lead white and chalk was a necessary step in the process of painting because placing oil directly on canvas will cause the canvas to rot.
Traditional gesso is very different than the acrylic gesso that is in common use today. It was made by making rabbit-skin glue on the stovetop and adding in a mixture of powdered gypsum, marble dust and lead white. This was only used on wood panels, as it was too brittle to be used on a flexible painting support such as canvas. It is no longer a recommended method, as the rabbit skin glue absorbs moisture on damp days, and releases it on dry days, causing cracking in oil layers.
Acrylic gesso is an absorbent paint made with titanium white, calcium carbonate and an acrylic base which provides an excellent ground for paint to adhere to. It’s typically white, but can be found in other colours, such as black and titan buff, or even transparent. You can even mix acrylic paint into the gesso if you’d like to start with another colour.

About to start the priming process with our Nu-Art Gesso.
Gesso is still used with acrylic painting even though there is no danger of the paint rotting the canvas. It gives the artist a smooth, adhesive surface for the paint, and many people like starting on a fresh, white surface. You can experiment with applying acrylic paint directly onto unprimed canvas. However, lighter, more watery applications of the paint will bleed into the canvas, much like watercolour on paper.
If all this talk of priming sounds exhausting, pre-primed canvas can be a lifesaver if you’re in a hurry! Gwartzman’s primed canvas is double acrylic primed, and is suitable for both acrylic and oil painting. It is, however, slightly more difficult to stretch onto a frame than unprimed canvas, due to the stiffness that the gesso adds to the surface of the canvas. Primed canvas is also more prone to creasing as well, and should always be stored rolled, not folded.

Pictured above are the front (l) and back (r) of our 3/4” stretcher bars

Pictured above are the front (l) and back (r) and crossbar of our 1.5” stretcher bars
Make sure the canvas that you’re going to be stretching is at least 4” larger on all sides than the stretcher frame, as you’ll need the excess to fold over onto the back of the stretcher.

Make sure there's enough excess canvas to stretch over the frame
Once you’ve firmly put the stretcher frame together, place it on to the center of the canvas with the smooth (non ridged) side of the stretcher facing down.

Putting the frame together. The back side of the stretcher is shown here.
Pick a side of the frame to start stapling. Start at the middle of one side of the stretcher and use a staple gun to attach the canvas to the back of the stretcher. Then, go to the opposite side of the frame, and pulling firmly, place another staple in the middle of the stretcher bar. Do the same with the remaining two sides.

Always start your staples in the middle.
Start stapling about every inch or so down each side of the stretcher, making sure to switch sides every few staples. The canvas needs to be firmly stretched on all sides. You want to have about an even amount of staples on all sides to prevent ripples in the surface of the canvas. Stop stapling within the 2-3” before each corner of the stretcher.

Try to keep an even spacing with your staples.
Canvas pliers can be a useful tool to have around if you find that gripping the canvas is difficult, or if you're working with a very large canvas, or pre-primed canvas which is very stiff. Some have rubber grips to grasp the canvas and others have metal teeth. Being used in the photo below are the Fredrix Deluxe Canvas Pliers. This particular model has spring loaded handles and and rubber grips.

Canvas pliers in use

Invert canvas corner to begin folding the corners
Now it’s time to fold in the corners of the canvas. Stand or sit in front of a corner of the stretcher frame. Take the tip of the corner of the canvas and pull it in towards the centre of the canvas.

Folding the corner
With one hand, pull the side of the canvas over the stretcher and staple it down. Then pull the canvas from the bottom up and over and staple again.

Stapling the corner
Repeat for all sides. Turn the canvas over and look for ripples in the surface. Now is the time to take out staples and readjust, it will be more difficult to do after priming!
Smooth, snugly stretched canvas will sound a bit like a drum when you tap it. If the canvas is smooth, but a bit loose, take a spray bottle of water and lightly mist the back of the canvas. As the water dries, the canvas will shrink and tighten. Be careful to not over tighten, as this can cause the stretcher to crack. Wait for the canvas to dry before applying gesso. Trim any excess canvas off with scissors.

Fully Stretched Canvas
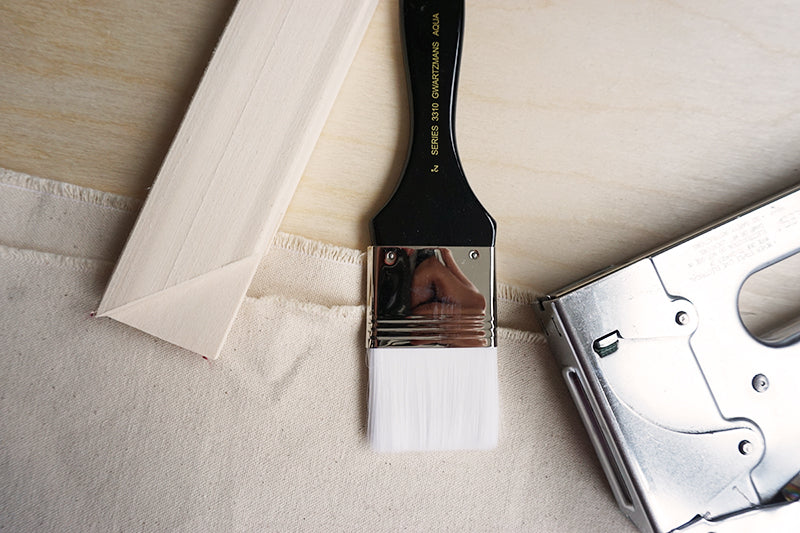
Onto priming! Gesso can be a bit thick right out of the bottle. For an easier time painting the gesso, add a bit of water (up to 25% of the volume of gesso) to smooth it out. We recommend our 2" Flat White Taklon Brush for gessoing small canvases. It goes on smooth, and doesn't leave hairs on the surface of the canvas. We have up to 4" wide for larger canvases.
Lay down a coat of gesso with all the brushstrokes going in the same direction. One coat will provide decent paint adhesion, but to make sure the canvas is fully covered, at least two coats of gesso, but preferably 4 are recommended. Wait for the gesso to dry between applications. For the best gesso coverage on the canvas, rotate the canvas 45 degrees between each coat.

Don't forget the sides of the canvas!
You can leave the gesso as is between layers, and a slightly rough, toothy surface will form. If you want a smoother surface, you may sand the dry gesso between layers.

Sanding the gesso between layers
And you’re done! Once it’s dry, get ready to start your painting!